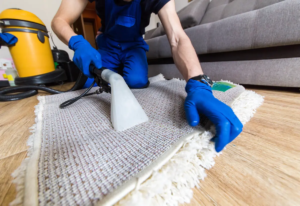
While you take care of daily maintenance by vacuuming and treating spots, it takes professional carpet cleaning to remove the trapped dirt, oils and odors that build up over time.
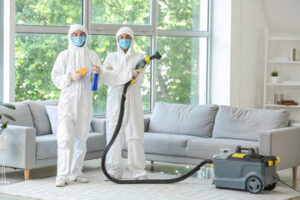
While many homeowners use rental equipment to clean their own carpet, ServiceMaster Clean follows a process that ensures your carpet’s deep fibers are cleaned and that detergent residue is rinsed thoroughly. This provides a number of important benefits: Contact Residential Carpet Cleaning El Dorado Hills CA now!
Carpet is an attractive and functional addition to any home. Unfortunately, dirt and pollutants tend to settle and cling to its fibres. Regular cleaning can remove these contaminants and keep your family healthy. It’s important to use a professional carpet cleaner.
When you choose a professional carpet cleaner, look for one that is CRI (Carpet and Rug Institute) certified. This certification ensures the cleaner will use hot water extraction, which is the most effective method for removing dirt and debris from carpet. It also helps to maintain your carpet’s warranty.
Vacuuming and spot cleaning can help eliminate some stains, but others are more persistent. In many cases, these stains are actually a sign that your carpet is due for deep cleaning. A lingering odour is another sign that your carpet needs attention. This can be caused by spills, pet accidents, and trapped moisture. A professional carpet cleaning will remove these odours at their source and leave your home smelling fresh and clean.
A dirty carpet can have a negative impact on your family’s health, as it can harbor bacteria and allergens. These can lead to breathing issues, skin irritations, and even illness. Regular cleaning can eliminate these harmful microorganisms and enhance your family’s overall health and wellness.
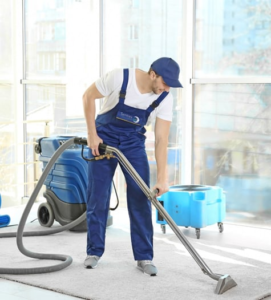
Using doormats outside and inside, establishing a “no shoes” policy in carpeted areas, and changing your air filters can all help reduce the amount of dirt that builds up on your carpet. However, it’s impossible to completely prevent a build-up of dirt and pollutants. That’s why it’s a good idea to have your carpets professionally cleaned every 6 to 12 months. A professional cleaner will use heavy-duty machinery to dispense and extract cleaning agents and hot water, leaving your carpets feeling fresh and looking great. They will also use a pH neutralizing agent to eliminate any residual soapy or alkaline solution, which can damage the fibres of your carpet. This ensures your carpet is safe for children and pets.
Appearance
Regardless of how clean your furniture, wall paint or chandelier may be, dirty carpets make the whole room look unclean. This is because carpets trap a lot of dirt, dust and other germs that cause unpleasant odors. The good news is that a residential carpet cleaning company can get rid of all these things to make your home or office smell clean and fresh again.
In addition, regular carpet cleaning prevents the buildup of stains and dirt that can make your carpet fibers yellow or fade in color. Most carpets today have been treated with a stain-resistant coating, but this coating does not last forever. Professional cleaning companies can revive and brighten your carpet with a variety of methods, such as hot water extraction, abrasion or dry compound.
Choose a residential carpet cleaner that is licensed and insured. You should also be able to check the company’s reviews online. This will help you find a company that is not only experienced but has great customer service and a good reputation.
Another important factor is the type of cleaning method the company uses. The best choice is a low-moisture carpet cleaning process like hot water extraction. Other cleaning methods such as bonnet or chemical cleaning can actually damage your carpet by overwetting, over-saturating or improperly mixing chemicals.
The company should also ask you about your lifestyle to determine if there are any specific needs for your carpets. For example, households with pets or children need to be vacuumed regularly to remove pet dander and other allergens that can be trapped in carpets. On the other hand, a house with just one or two people may only require cleaning every 18 months or so.
Health
Dirty carpets can harbor germs and bacteria that are detrimental to your health. Regular cleaning of your carpets will remove these contaminants and improve your indoor air quality. This is particularly important for households with children or pets. Carpet cleaning professionals use specialized equipment and solutions that are environmentally friendly and safe for your family. They can also eliminate stubborn stains that haven’t been removed by vacuuming alone. They can even sanitize your carpets using UV rays that kill bacteria and eliminate foul odors.
A clean carpet has many health benefits, including the ability to reduce allergies and asthma symptoms. It also helps protect your family’s mental and physical well-being. Regular cleaning can also prolong the life of your carpets. A well-maintained carpet is a nice complement to your home’s decor, and it can create a positive first impression on visitors.
Daily maintenance includes vacuuming to remove surface dirt, and occasional spot treatment using a commercial stain removal product. However, for best results, professional cleaning should be done on a regular basis. This will help extend the life of your carpets and ensure they remain as healthy as possible for as long as possible.
Hiring a professional carpet cleaner is worth the investment. Aside from using eco-friendly cleaning products that are safer for your family and the environment, they can also eliminate stains, deodorize, sanitize, and restore your carpets to their original beauty. In addition, a professional carpet cleaner can use low-moisture cleaning methods that reduce the risk of mold and mildew, which can damage your carpet fibers if left unattended.
The frequency with which you need to hire a professional carpet cleaning service will depend on how much foot traffic your home or business receives. For example, if your carpets are exposed to heavy amounts of traffic, they may need to be cleaned every 3-4 months. This will ensure that the dirt and allergens are removed effectively before they cause respiratory problems. Likewise, if you have a pet or children with allergies or asthma, then they will need to be cleaned on a more frequent basis.
Durability
Your carpets are an integral part of your home, adding comfort, beauty and a higher resale or rental value. It’s important to keep them clean to protect your investment and keep your family healthy. A routine cleaning schedule extends the life of your carpet and can help those with allergies and asthma breathe easier. A dirty carpet can be a source of dust mites, pet dander, and other allergens. In addition, carpets can trap airborne pollutants such as lead, asbestos and VOCs (Volatile Organic Compounds) that have been linked to health issues, including asthma, bronchitis and even cancer. A routine professional cleaning can reduce these contaminants and keep your family healthy.
Vacuuming regularly and keeping the doormats at the entrances to your home and offices clean helps prevent dirt and soil from soaking into the carpet fibers. This simple practice can also help eliminate odors and reduce the frequency of deep cleaning.
Taking your shoes off at the door, encouraging household members to wipe their feet on entry mats and keeping area rugs clean are additional ways to limit the amount of dirt that is allowed to enter your carpet. In many cases, these precautions can significantly reduce the number of times you will need to have your carpets professionally cleaned.
Dirt and soils tend to cling to the surface of your carpet, especially in high traffic areas. When these stains are allowed to remain in your carpet for too long, they can penetrate deeper into the fibers and become permanent. Taking immediate action by blotting the stain with a clean cloth and following up with a commercially available stain remover can dramatically reduce the chances of a permanent color change in your carpet.
Carpet manufacturers today build anti-static and stain resistant technology into their fibers, which can extend the useful life of your carpet. In addition, factory applied protective coatings can help repel spills and keep stains from penetrating the carpet fibers.
Using a low moisture, eco friendly residential carpet cleaning method is the best way to maintain the beauty and lifespan of your carpet. When choosing a carpet cleaner, look for one that uses hot water extraction with truck-mounted equipment and is certified by the CRI (Carpet and Rug Institute). They should also be able to tell you whether they will pretreat stains, move furniture, and reapply stain proofing.